Skip to content
Triplett Full Product Catalog: Volume 1 Now Available

Country

Milliohm Meters

Ohm is a unit to measure electrical resistance, and milliohm implies identifying even the smallest values of resistance. Milliohm meters are devices to measure precision values in various circuits. In many applications, a handheld milliohm meter is used to check the low resistance in two or more connected wires. Triplett offers some of the best milliohm meters in various configurations. They not only determine low resistance values but also conductivity characteristics of components, printed circuits, relays, switches, and more. These are essential tools for professionals dealing in electrical components as our precision milliohm meters offer accurate mΩ measurements with a maximum resolution of 100mΩ.

Filters

  • Free Shipping*
    Original price $1,544.00 - Original price $1,544.00
    Original price
    $1,544.00
    $1,544.00 - $1,544.00
    Current price $1,544.00

    Battery Powered MilliOhm Meter - (ML200)

    Triplett Test Equipment & Tools
    In stock

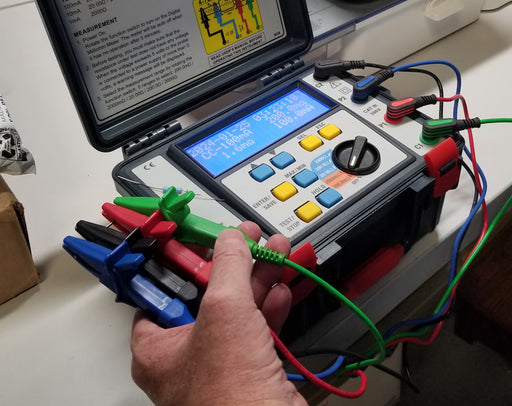
    The Triplett Model ML200 Battery Powered Milliohm Meter measures low resistance and conductivity characteristics of components, contacts, connector...

    View full details
    Original price $1,544.00 - Original price $1,544.00
    Original price
    $1,544.00
    $1,544.00 - $1,544.00
    Current price $1,544.00

Know More About Triplett Milliohm Meters

About Our Milliohm Meters

Accurate and precision measurement are key and Triplett’s milliohm multimeters offer an accuracy of ±0.8%. These meters follow 4-Wire method for mΩ measurement for precision and accuracy. These meters come with 4 Line x 20-character LCD display for easy reading of values. Additionally, there are many other features such as a real-time clock/calendar function for accurate timestamping, storage of up to 200 measurements, recording of the highest and lowest values, auto power off, data holding, and more.

Precision in Milliohm Meters

In milliohm meters, precision refers to the consistency and reliability of the instrument in providing accurate measurements, especially for very low resistance values in the milliohm range. It indicates how closely repeated measurements using the meter align with a known or expected value. High precision is important in applications where small changes in resistance need to be detected, such as in testing electronic components or conducting quality control checks. A high-precision meter doesn't necessarily guarantee high accuracy. The meter might deliver consistent readings, but those readings could be slightly off from the true value due to calibration errors or other factors. Ideally, you want a milliohm meter that is both precise and accurate.

A high-precision milliohm meter will produce consistent readings that are very close to the actual resistance value, even when taking multiple measurements of the same component. This is crucial for ensuring the reliability of test results, especially in critical applications like Identifying poor connections in electronic circuits that can cause performance issues and verifying the integrity of delicate electrical components during manufacturing or maintenance.

A low-precision milliohm meter might show variations in readings for the same component, making it difficult to determine the exact resistance value with confidence. This can lead to misinterpretations and potentially overlook crucial issues.

Digital milliohm meters vs. Analog milliohm meters

  • Choose a digital milliohm meter if you prioritize high accuracy, data storage, ease of reading, and additional features. These are ideal for professional use or applications requiring precise low-resistance measurements.
  • Consider an analog milliohm meter if budget is a major concern, you need a simple and fast-responding tool, or you're comfortable interpreting analog scales. However, be aware of the limitations in accuracy, especially for critical measurements.

Types of Milliohm Meters

Milliohm meters can be categorized in a few different ways, depending on the specific feature or functionality being highlighted. Here's a breakdown of some common types:

  • 2-wire Milliohm Meters: 2-wire is a measurement method used in these milliohm meters. This method is easy, wherein the same two pairs of wires are used to supply current to the resistor and measure voltage. These meters are inexpensive and used in simple applications that may not require extreme precision.
  • 4-wire Milliohm Meters: 4-wire meters are relatively expensive and useful for complex applications as they offer precision and accurate measurements. In this method, two separate pairs of wires are used for supplying current and measuring voltage of the device under test (DUT), respectively. Since the voltage measurement and lead resistance paths are different, measurement of voltage is not affected.
  • Handheld Milliohm Meters: With their portability, accuracy, and ease of use, handheld milliohm meters are valuable tools for anyone working with electrical systems where low resistance measurements are critical.

4 Wire Method - Best for Measuring Milliohms

As per current industry standards and after referring to various feedbacks and testimonials, 4-wire measurement method, also known as Kelvin measurement technique, is the best choice for measuring low resistance. This is especially true for slightly intricate and complex circuits in cables and connectors, printed circuit board (PCB) traces, relay contacts, and so on in devices used across industries. These are usually resistance values with less than 1 ohm and resolution in milliohms. 4-wire technique is the best so far as it prevents the effects of test equipment lead and probe resistance. In this, current of known value is passed through DUT. The drop in voltage due to resistance is measured. The four wires are connected to measure two force and two sense connections. Resistance in the two sense connections is calculated using Ohm’s law; however, the voltage drop between the force test leads cannot be detected in this case. This is why using 4-wire milliohm meters is significant. Our 4-wire meters come with features that make such measurements easy. Here’s how to use our meter.

  • Power on and rotate the function switch.
  • Before testing, ensure DUT does not have any voltage.
  • Select the scale range, such as 200.0mΩ, 2000mΩ, 20.00Ω, 200.0Ω and 2000Ω, by rotating the function switch.
  • The screen will display date, time, test current and maximum resistance.
  • Press the appropriate button; such as TEST/STOP to measure the resistance value; MAX/MIN button to get the maximum value or minimum value; HOLD to keep the value of resistance; and STOP to stop the measurement.
  • Likewise, you can easily navigate through the menu because of the user-friendly interface, such as UP/DOWN, ESC, Date ADJ, and more.

Applications of Milliohm Meters

As mentioned, our milliohm meters find applications in complex circuits across industries. Here are some application areas across industries such as electronics, automotive, and aerospace.

  • PCBs
  • Relays
  • Connectors
  • Cable joints and wires
  • Switches
  • Bus bars
  • Resistive components

Features to Consider When Choosing a Milliohm Meter

Here are some factors to consider when choosing a milliohm meter.

  • Measurement Range: One needs to analyze their requirement in terms of how much low resistance they need to measure, and decide the range accordingly.
  • Accuracy: This is the closest possible reading to the actual value, either expressed in percentage or total value. The level of accuracy required would vary with the application. Check the accuracy and precision aspects in the user manual and then decide.
  • Power Supply: These are battery-powered devices; hence, check the battery type and capacity.
  • IP Rating: Checking the enclosure IP rating is essential. IP65 rating with the cover closed is common for milliohm meters.
  • Features: Check for standard and additional features such as adjustable sampling rate, data storage and logging, temperature compensation, alarm lights, auto-ranging capabilities, operating temperature range, display type, and more.

Maintenance and Calibration

Regular maintenance and calibration are important for any device, and the same applies to milliohm meters. This ensures both accuracy and reliability.

  • Fix a period or timeframe for calibration based on your application requirements. Most of the times, it is done annually; however, it is best to refer to the manufacturer’s guidelines. Also, this depends on your usage.
  • While our milliohm meters are quite low on maintenance, it is recommended to store them in a protective enclosure when not in use.
  • Ensure it remains clean and free of dust, contamination, and so on.
  • Perform a visual inspection periodically to check for any signs of damage to test leads, probes, and so on.
  • Maintenance of the battery is just as essential. If you receive a LoBAT message on the right lower part of the display, you need to replace the batteries. This is quite easy. You need to unscrew the battery cover after disconnecting the test leads and switching off the power. Replace the batteries and re-install the cover.
  • You may also need to replace the fuse with a new one of the same specification.